it’s very important to protect information from the World Wide Web because there are so many bad things can that happen with the negligence of our data.
In software engineering, having the data protected from the authorised axis is supercritical and hence similar concept applies in test automation as well.
While building a test automation framework, we should not ignore to protect the important information such as the username and password URL of our environment, API, keys, data, credentials and so on.
If this sensitive information is leaked to outside the world via a repository, then it can pose a big threat.
hence we should be very careful to enforce a very secret management system this is a very good script that comes to the rescue and it provides a super easy way to implement and I would like to talk about it. How to use it
so basically this is pretty easy to set up. We can follow the step-by-step information available in there to get positive to make it very simple. I would like to add a couple of steps that would help quickly set up it and then use it.
Note: Before you proceed, ensure the below steps to be done
If your repository with credentials is already committed then you have already exposed them. Once you enforce git-crypt, make sure to change all credentials to remidiate.
If you are working on a new repository then ensure to do this setup first thing or an early action item so you don’t accidentally expose secrets by commits
# Install (chose the steps for linux as mentioned in doc)
brew install git-crypt

# init
cd repo
git-crypt init

# save secret key file
git-crypt export-key git-crypt-secret

# Specify files to encrypt by creating a .gitattributes file:
# to encrypt single file
secretfile filter=git-crypt diff=git-crypt
# to encrypt file with extension
*.key filter=git-crypt diff=git-crypt
# to encrypt whole directory
secretdir/** filter=git-crypt diff=git-crypt

# check status
git crypt status

# Common error
## *** WARNING: staged/committed version is NOT ENCRYPTED! ***
# To solve this, make some changes to those files and commit

# lock or encrypt file
git crypt lock

# unlock or decrypt file with secrete file
git crypt unlock git-crypt-secret
Lastly, make sure to keep the secrete file git-crypt-secret within the team or store in a password or secured space.
While working with UI test automation, Selenium being most popular choice, people use it quite heavily.
However out of many best practices, the Webdriver clean up process is also critical.
Why?
If WebDriver is not closed properly, it still remains active in the system and consumes memory, which leads the system slow.
This issue becomes bottleneck while working with massive parallel tests and the system can not handle tests properly due to memory leakage happened due to these unattended WebDriver processes.
Even though we use driver.quit(), it will only get executed if the test gets executed till the end , but if the test fails abruptly due to some issue, the quit() method do not close the WebDriver process.
Solution:
Just like we write driver.quit() for each Test we also need to include the process termination code. Mainly we launch fresh WebDriver instances every time for each Test hence we keep driver.quit() in @AfterMethod.
However we can not keep Terminate process code here because, if we are running parallel Tests, it might kill those too. So it is better to keep the process termination script at the very end, when all the Tests are executed.
This can be in @AfterSuite . Below is the code for Java:
  public static void terminateWebDriverProcess() {
        log.info("<<< WebDriver process cleanup >>>");
        try {
            if (System.getProperty("os.name").contains("Windows")) {
  Process process = Runtime.getRuntime().exec("taskkill /F /IM chromedriver.exe /T");
  process.destroy();
  log.info("All active WebDriver processes terminated !");
            } else {
                log.info("No active WebDriver process found!");
            }
        } catch (Exception e) {
            log.info("<<< Error occured while cleaning up WebDriver process." + e);

        }
Note: – you can alter the script if you are on Mac or Linux. – Replace log.info() with SYSOUT if logger is not implemented.
While working with jmeter, I faced an issue of character encoding in http sampler request.
My problem:
I had to send a POST request with json request body , which had different characters from different languages. I was able to send request successfully using postman but the same request when I added to jmeter, it was throwing below error:
Invalid UTF-8 middle byte 0x3f
I tried to searching on web but none of the solutions worked.
What did I try?
Set the jmeter properties file: sampleresult.default.encoding=UTF-8 (Didn’t work)
Set the header Content-Type=application/json;UTF-8 ( Didn’t work)
CSV is one of the fastest way to read and write data during test automation.
Benefits of CSV over Excel:
CSV is better than Excel in many cases, specially when it comes to test data or any data that we store to use within test framework. Below are few reasons where CSV is better than Excel:
CSV is lightweight and faster than excel with respect to read / write operation
CSV takes up less space than Excel
CSV is compatible with versioning systems like Git as Excel is not suitable for Git to track changes
CSV can be used by the test automation script while it is open , Excel sheet needs to be closed before running test script.
While working with TestNG , we deal with multiple set of test data to test various scenarios.
It is difficult to provide test data set using List , Map as these needs maintenance and efforts.
Most popular way of providing test data is using Excel. Check this article on how to use Excel in Data provider. Now we will discuss another way using CSV file.
Why CSV ?
CSV is better than Excel in many cases, specially when it comes to test data or any data that we store to use within test framework. Below are few reasons where CSV is better than Excel:
CSV is lightweight and faster than excel with respect to read / write operation
CSV takes up less space than Excel
CSV is compatible with versioning systems like Git as Excel is not suitable for Git to track changes
CSV can be used by the test automation script while it is open , Excel sheet needs to be closed before running test script.
So now lets look at the code on how to read csv file line by line and provide it to data provider.
Read CSV file and return 2D Object array:
public static Object[][] readCsv(File file) throws JsonProcessingException {
        Object obj[][]=null;
        try {

            // Create an object of filereader
            // class with CSV file as a parameter.
            FileReader filereader = new FileReader(file);
            //Skipping Header
            CSVReader csvReader =
                    new CSVReaderBuilder(filereader).withSkipLines(1).build();

            List<String[]> allData = csvReader.readAll();

            int rowCount = allData.size();
            System.out.println("Row count= " + rowCount);

            String[] headers = allData.get(0);

            int colCount = headers.length;
            System.out.println("Col count=" + colCount);

            obj = new Object[rowCount][colCount];

            for (int i = 0, j = 0; i < rowCount; i++) {
                while (j < rowCount) {
                    String[] rowData = allData.get(i);
                    for (String cell : rowData) {
                        System.out.print("Row: " + i + "Cell= " + j);
                        obj[i][j] = cell;
                        System.out.println(" | " + obj[i][j]);
                        j++;
                    }
                }
                j = 0;
            }
        } catch (Exception e) {
            e.printStackTrace();
        }
        //To print 2D array
	System.out.println("CSV Data : "+Arrays.deepToString(obj));
        return obj;
    }
Now you can use this Object to create data provider:
@Test(dataProvider = "athleteData",dataProviderClass = DataProvider.class){
public void testCsvDataProvider(String email, String password){
      System.out.println(email + password)
     // Use this data in Test
   }
}
Contract testing is a way to ensure that services (an API provider, a client etc.) can communicate with each other.
The contract is between a consumer (for example, a client who wants to receive some data from an app) and a provider (for example, an API on a server that provides the data the client needs). In a microservice architecture, the terms client and server are not always suitable to encapsulate the connectivity between services. Communication methods are different, and the hierarchy of roles is not as clear. For this reason, we stick to consumer and provider in this article.
What is consumer-driven contract testing?
With contract testing, we want to ensure that a service works between a consumer (same as the client) and an API provider (the provider).
What happens when the provider changes a part of the service? You will need to know if the consumer can still use the service and whether the changes still meet the demands of the consumer’s contract. This is when you need to perform consumer-driven contract testing.
Since these contracts are written and managed exclusively by consumers, providers must first obtain permission from consumers before they can make any changes. If providers need to implement new features, they can see which consumers would be affected by the change(s) by looking at the status of the consumer’s contract tests.
Tools for Contract testing:
Postman (Best to start with and has great feature )
Pact ( Specialist in this field,Supports all languages, but limited for free version)
JsonSchema validator / everit ( With Rest assured )
POSTMAN:
Read this article where I have described how to do schema validation using POSTMAN via ajv library.
This is another article which explains beautifully an advanced way of contract testing using postman
PACT:
I was studying about contract testing and I bumped on a brilliant conference by Atlassian where two amazing guys discuss how contract testing is very crucial and beneficial in API testing. ( Pretty funny video too 🙂 )
Credit: Atlassian youtube channel
Karthik explains here beautifully about how to implement pact in API testing.
Lets take and example of a Rest assured request which will return the below json body . We will validate this response using json schema.
{
    "id": 1,
    "username": "Avishek"
}
Now we need to convert this json to json schema. There are many online tools available. We will use below website : https://jsonschema.net/ Paste the json on the left pane and click submit, it will generate the schema. Save the schema in a .json file ( Lets name it as UserSchema.json ). it will look something like below:
{
    "$schema": "http://json-schema.org/draft-07/schema",
    "$id": "http://example.com/example.json",
    "type": "object",
    "title": "The root schema",
    "description": "The root schema comprises the entire JSON document.",
    "default": {},
    "examples": [
        {
            "id": 1,
            "username": "Avishek"
        }
    ],
    "required": [
        "id",
        "username"
    ],
    "properties": {
        "id": {
            "$id": "#/properties/id",
            "type": "integer",
            "title": "The id schema",
            "description": "An explanation about the purpose of this instance.",
            "default": 0,
            "examples": [
                1
            ]
        },
        "username": {
            "$id": "#/properties/username",
            "type": "string",
            "title": "The username schema",
            "description": "An explanation about the purpose of this instance.",
            "default": "",
            "examples": [
                "Avishek"
            ]
        }
    },
    "additionalProperties": true
}
Here is the method for validating schema using everit:
While working with API test automation we use tools like rest assured with Java. We have many ways to parse json and extract values but rest assured has in-built methods which supports json value extraction from Response object.
Example using jsonPath() : To extract the email from below response in rest assured:
Many a times when we run automated test using selnium in IE browser, we get below error: org.openqa.selenium.remote.SessionNotFoundException: Unexpected error launching Internet Explorer. Browser zoom level was set to 125%. It should be set to 100%
Reason: When the default zoom is set not at 100% and due to which, the IEDriverServer throws exception as it is expecting the value as 100% so that it can click at the middle.
3- Using javascript executor driver.executeScript(“document.body.style.zoom=’100%'”);
4- Using key actions driver.findElement(By.tagName(“html”)).sendKeys(Keys.chord(Keys.CONTROL, “0”));
5- Using Desired capabilities ( Deprecated )
DesiredCapabilities caps = DesiredCapabilities.internetExplorer();
caps.setCapability("ignoreZoomSetting", true);
aDriver = new InternetExplorerDriver(caps);
Conclusion: So which one should we use? In my opinion, – we must choose one that works for not only IE but also other browsers too (Even though not required). – We should use a solution which is compatible with remote machines without doing any extra level of setting ( IE browser setting is ruled out , as it needs extra setup ) – we do not want our code to be changed when we change our browser type. And also we do not want to use deprecated solution as it might create issue in future due to incompatibilities after updated dependencies. (#5 is ruled out )
So we are left with #3 (javascript executor ) and #4 (Key action) which works well for all browsers and no extra setup needed.
Let me know your thoughts , if you have any better solution, write me in the comments.
OAuth 2.0 is the industry-standard protocol for authorization. OAuth 2.0 focuses on client developer simplicity while providing specific authorization flows for web applications, desktop applications, mobile phones, and living room devices.
While testing API , authentication mechanism is a crucial part to deal with and there are many ways of authenticate a service depending on the application and its requirements.
We will discuss few mostly used scenarios used with OAuth2.0.
We will use below website to create OAuth2 based test application and understand how it works, so that we will be able to test efficiently the authentication scenarios.
1- Create a test application which implements Oauth2 using above url
Sign up and create an application from API page as below:
2. Provide name,redirect url ( an invalid url, so that we will be able to see the URL)
It will crate an application along with below details:
Client id
client secret
3. Navigate to authentication tab and select the above created application. It will display all the details on how to access the api.
2. Understanding OAuth parameters
client_id : It is a unique id assigned to a client or application who wants to use the authentication service provider. It is a public identifier. In this case, COOP is the Auth service provider and our Test application is a client who will use this Authentication. Similar scenarios is also seen in case of google or facebook. Many application has integrated google and facebook as a Oauth2 identity service. So all those application have unique id given by Google or facebook.
client_secret: It is also a unique passcode provided to each client based on client_id. So client_id and client_secret both combined can have a unique identity of an application
grant_type: In OAuth 2.0, the term “grant type” refers to the way an application gets an access token. There are several types of grant_type used. The Authorization Code Grant Type is probably the most common of the OAuth 2.0 grant types that you’ll encounter. It is used by both web apps and native apps to get an access token after a user authorizes an app.
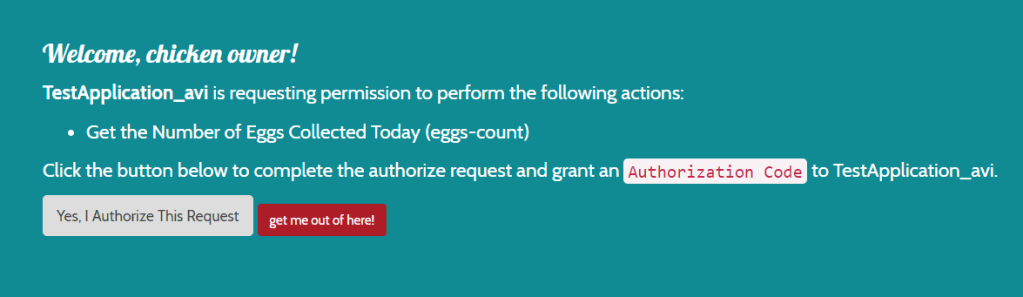
It differs from most of the other grant types by first requiring the app launch a browser to begin the flow. At a high level, the flow has the following steps:
– The application opens a browser to send the user to the OAuth server – The user sees the authorization prompt and approves the app’s request – The user is redirected back to the application with an authorization code in the query string – The application exchanges the authorization code for an access token More details in this article.
client_credentials: The simplest of all of the OAuth 2.0 grants, this grant is suitable for machine-to-machine authentication where a specific user’s permission to access data is not required. It does not require any web browser action or any code. redirect_url: User will be redirected to this url on successful login.
We will get token and other details like refresh token, scope and expiry time.
We can now test this token by calling Get profile endpoint. Make a GET request with below details in postman:
GET: http://coop.apps.symfonycasts.com/api/me
Header:
Authorization:Bearer <use token received from above request>
It will give the user profile details from whom we got the code while authorization in browser.
Now that we know how to get code , token and get profile details we can automate the end to end flow. Summary of the steps to be performed:
Navigate to authorization url in browser to let the user authorize after login. We can achieve this via Selenium (Running selenium in headless mode)
System.setProperty("webdriver.chrome.silentOutput", "true");
        ChromeOptions options = new ChromeOptions();
        options.addArguments("--headless");
        options.addArguments("--disable-gpu");
        options.addArguments("window-size=1920,1080");
        options.setPageLoadStrategy(PageLoadStrategy.NORMAL);

        WebDriverManager.chromedriver().setup();
       driver = new ChromeDriver(options);

        String emailLocator="form-email";
        String pwdLocator="form-password";
        String loginLocator="//button[@class='btn btn-primary']";
        String authorizeBtnLocator="//a[@class='btn btn-default']";

WebDriver driver = getDriver();
        driver.get("http://coop.apps.symfonycasts.com/authorize?client_id=Avishekapp1&response_type=code&scope=profile&redirect_uri=http://localhost");
        driver.findElement(By.id(emailLocator)).sendKeys("email of the user who will authorize");
        driver.findElement(By.id(pwdLocator)).sendKeys("password of the user who will authorize");
        driver.findElement(By.xpath(loginLocator)).click();
        Thread.sleep(4000);
        driver.findElement(By.xpath(authorizeBtnLocator)).click();
        Thread.sleep(5000);
        String fullUrl= driver.getCurrentUrl();
2. After authorization code will be generated in browser url, we need to fetch the url via selenium and extract the code using String method